How to Draw a Realistic Dog
Learn to create a lifelike dog drawing through step-by-step instructions, focusing on shapes, shading, and details.
How to Draw a Realistic Dog
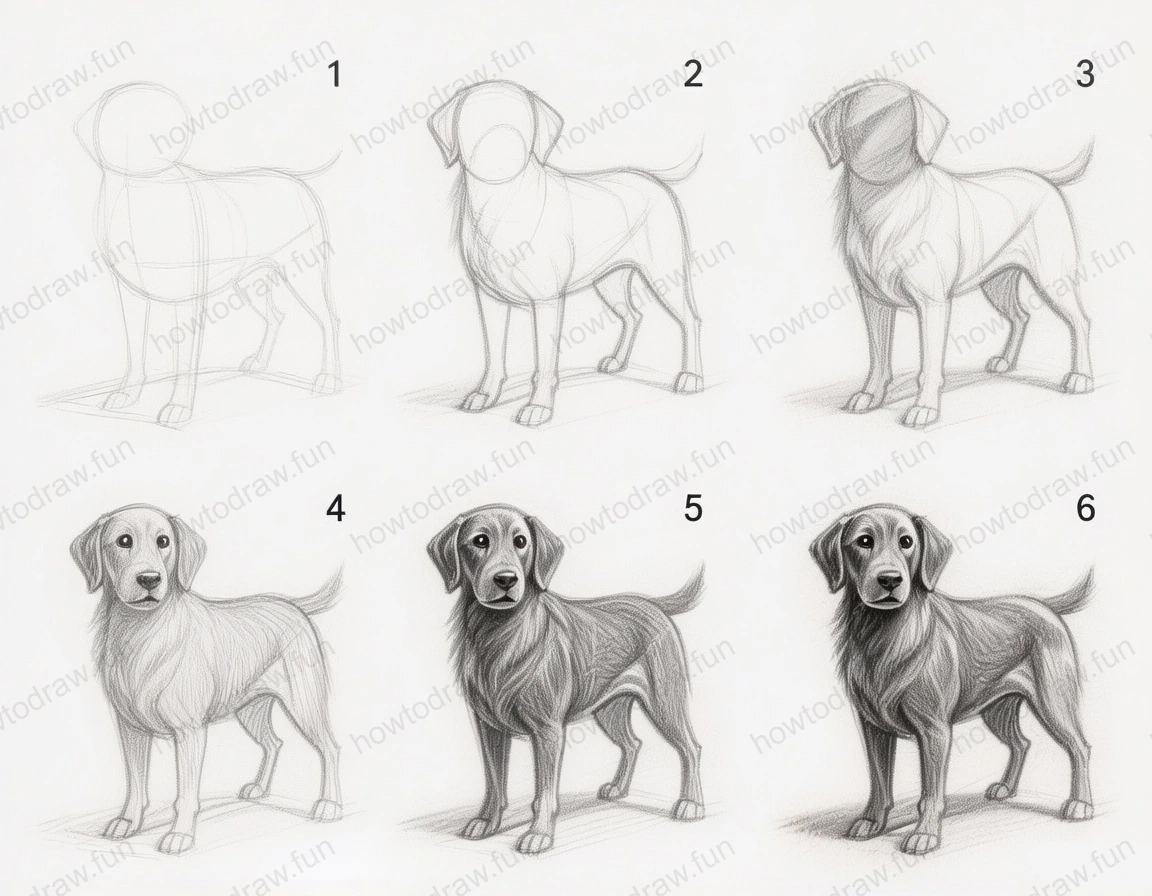
In this tutorial, you will learn how to draw a realistic dog through a series of detailed steps. Each step will guide you from basic shapes to a fully rendered drawing, emphasizing techniques to enhance your artistic skills. Get your pencil ready and let's start sketching!
Step 1:
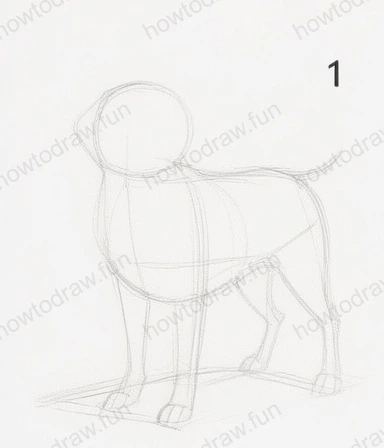
Begin your drawing by sketching the basic shapes. Start with a circular shape for the head and a larger oval for the body. Add two small ovals for the paws. Use light pencil strokes to outline these shapes, keeping them soft as you’re just starting to build your foundation. Position the head slightly above the oval body to give it a natural stance. Make sure the proportions are right; the head should not be too big or small compared to the body. Pay attention to the overall balance of the shapes to avoid disproportion.
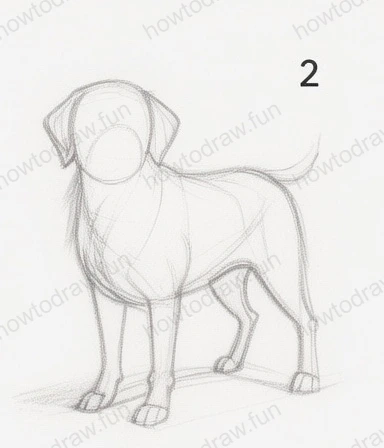
Step 2:
Now, refine the initial sketch by adding more details to the head and body. Outline the ears, which should be floppy and close to the head, and define the legs a bit more clearly. Connect the shapes more smoothly to create a natural flow. This step is crucial for establishing the dog's posture; ensure that the legs are positioned correctly for a standing dog. Remember to keep your lines light, as you will adjust them in later steps. Avoid pressing too hard with your pencil.
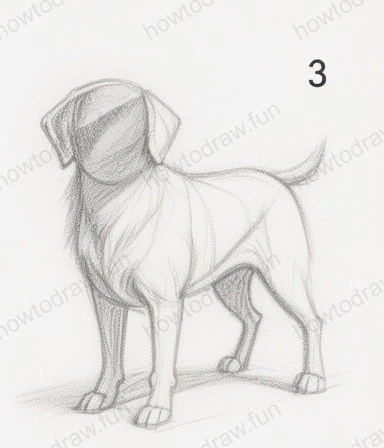
Step 3:
At this stage, you should start adding facial features. Draw the eyes, nose, and mouth, focusing on their placement. The eyes should be positioned about halfway down the head, while the nose should be at the end of the snout. Use gentle curves to create the mouth and give your dog a friendly expression. Add some fur lines around the face for texture. This step is essential to bring life to your drawing. Ensure symmetry in the facial features; this will enhance realism.
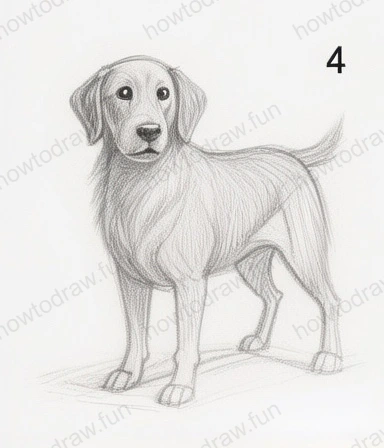
Step 4:
Now, start detailing the fur. Use short, quick strokes to represent the fur texture, especially around the neck and chest area. This is where you can define the character of your dog. Pay attention to the direction of the fur; it should flow naturally with the contours of the body. Begin shading lightly in areas that would naturally be darker, such as under the belly and between the legs. This depth will give your drawing more dimension. Remember to keep your hand light to maintain control.
Step 5:
Continue to build on the shading and texture. Focus on the legs and tail, adding more layers to the fur to create a fuller look. Use a blending technique for smoother transitions between light and dark areas. Pay special attention to the paws, ensuring they look grounded and proportionate. This step will help you achieve a more lifelike representation. Avoid overworking areas; sometimes less is more when it comes to shading.

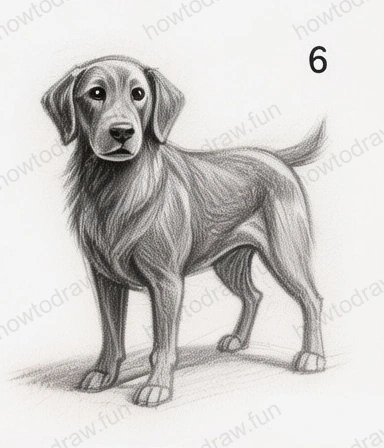
Step 6:
In the final step, refine your drawing by adding the finishing touches. Darken certain areas for emphasis, especially around the eyes to make them pop. Review your entire drawing for any inconsistencies in shading or detail. Use an eraser to clean up any stray lines or smudges. Finally, stand back and assess your work; make any last adjustments as needed. This is where your drawing transforms from a sketch into a polished piece of art. Celebrate your effort and creativity!
In conclusion, you’ve learned how to sketch a realistic dog by following these structured steps. From the basic shapes to the final shading, each part plays an important role in the overall composition. Keep practicing and don’t hesitate to experiment with different poses or dog breeds. The more you draw, the more skilled you will become. Remember, every artist starts somewhere, so keep sketching and enjoy the journey!
Reference Image
Here's the complete reference image: